 |
| Nightscout on the 640g: all data automatically transferred from the pump, with no additional data entry |
I've tried to distill the instructions down to the basics.
More detail can be found in the earlier posts on this blog.
The instructions that follow refer to a "SD card" installation. Of course, you don't need to use a SD card - for us this makes it easy to deploy and update with school etc, but you can change the paths quoted as you need to. You'll need at least a 1GB card. Plug in your SD card before proceeding. I'm assuming you're running Windows 10 (other versions will be very similar).
I've tested the instructions by reinstalling everything from scratch on a Windows 10 tablet, but it's still possible I've missed something - please do let me know: feel free to post a comment or question below, on Facebook or on Twitter.
Overview
- Plug in an SD Card (or decide on a suitable file location)
- Create some new folders
- Download a set of files
- Copy a handful of files and update them with your local parameters
- Setup your Nightscout site
- Install a handful of additional programs on your pc
- Tweak CareLink
- Test
- Enjoy!
Create Core Folders
Open File Explorer in Windows and double click on the SD Card (probably the D: or E: drive).Click on the New Folder icon and type "AutoCSV" (without the quotes).
This is where we'll throw the data around before uploading to Nightscout

This is where we'll ask Firefox to download the CareLink CSV file initially.
Download the Github files
From your browser, go to my mmcsv640g repository and click Download Zip
Extract the zip file to your SD Card (creating a folder called "mmcsv-mmcsv640g" and subfolders)
Download Firefox (Portable)
I suggest download Firefox Portable from here, but you can go direct to SourceForge for a specific version (this is tested with v43.0.4).Once downloaded, double click and unpack Firefox portable on your SD Card (creating a "FirefoxPortable" folder in most cases, but the exact location is not critical). You may wish to create a shortcut to the firefox.exe file on your desktop.
In Firefox, type "about:preferences" (without quotes) into the address bar. Change the Downloads, Save Files To: location to match that set above when you created the csv folder (e.g. D:\data)
Note: You can use your main (already installed) copy of Firefox instead if you wish
Download MiniMouseMacro
Move the MiniMouseMacro executable file from here and copy it to the SD Card's root directory (e.g. D:\)Download VirtualHere
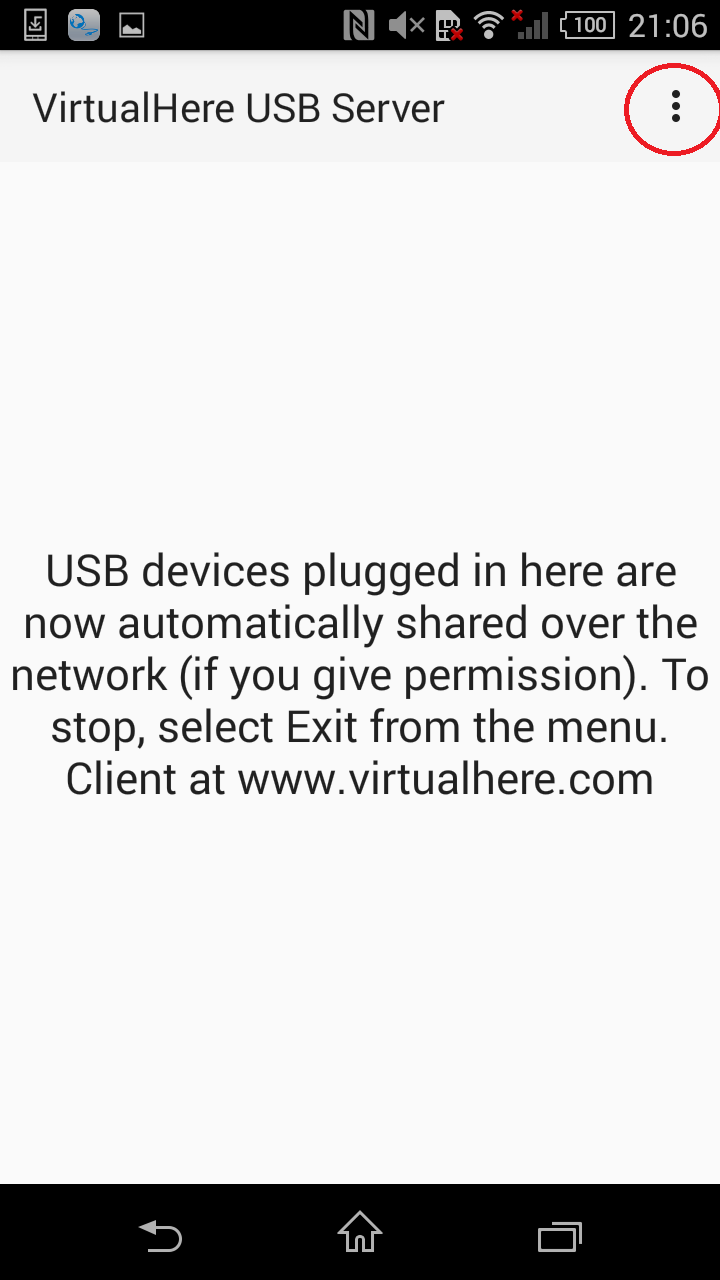
If you plan to use Nightscout with your Bayer meter plugged into PC, for example a bedside PC overnight, you can ignore this section.If you want the flexibility of being able to plug the Bayer meter into an Android phone (or a Raspberry Pi) and relay its signals back to a PC running CareLink you need to install VirtualHere.
Follow instructions on the VirtualHere website to download the VirtualHere Client for Windows and place it in the root directory of the SD card. Don't forget to select either the 32-bit (vhui32.exe) or 64-bit version (vhui64.exe) as required. Not sure which version you need? On Windows 10, go to the Settings app, click System, About and scroll to System type, where it will specify either 32 or 64-bit operating system.
If you want to use a mobile phone, you need a USB On-The-Go (OTG) capable Android phone.
You'll need to find your microUSB port (invariably your charging port)


http://www.maplin.co.uk/p/maplin-tech-on-the-go-micro-usb-to-female-usb-n36qg
http://www.amazon.co.uk/aLLreLi-LIFETIME-WARRANTY-Motorola-Samsung/dp/B0064GZAIQ
Please note: in my experience, cables are manufactured with larger tolerances on connection dimensions than would be ideal: hence, my original Sony USB OTG cable fits securely, stays put; the one I bought on Amazon is a little loose (and so tends to work loose once Janki moves around).
You must, of course, also download and install the VirtualHere server for your Android Phone: you can find information here and the VirtualHere Server on the Play Store here.

You should see the following message (below right) asking for confirmation that the device can access the USB device. Check the "Use by default" box and press OK.


Create Local Copies
From the mmcsv-mmcsv640g folder, copy the following files to the root directory of the SD Card (e.g. D: or E:). Making a copy means that when you next update the mmcsv files from Github you still have your local settings retained.
mmcsv640g.mmmacro
This defines the mouse click coordinates to initiate each upload - you might need to edit the x and/or y positions for your system. You can change these values and run the macro using the play button in MiniMouseMacro or just record your own mouse click macro from scratch using the record button. Save it as mmcsv640g.mmmacro.

config.sh
This contains default file locations and parameters, such as upload frequency, for use by the bash script. Assuming your SD Card is mounted as the D: drive it should read:
(NB Nightscout parameters explained later if you're new to Nightscout)
You need to check / update the parameters in bold below in the copy of this file
The "api_secret_hash" below is the SHA-1 Hash of your API-Secret string - to generate this, simply type in your API-Secret key into a converter, such as this one.
#! /bin/bash
# Initialising Carelink Automation
# Proof of concept ONLY - 640g csv to NightScout
#
# ****************************************************************************************
# USER SPECIFIC Working Directories - Please enter your details here
# ****************************************************************************************
# ExamplePath='/c/Data/Path'
# NB NO SPACES anywhere here, unless you know what you're doing please - Welcome to Shell Scripting :-)
Mmcsv640gPath='/d/mmcsv-mmcsv640g' #Installation Directory for mmscv640g stack
CSVDataPath='/d/AutoCSV' # The directory you want to throw all the data around in
DownloadPath='/d/data' # Where your CSV file downloaded from CareLink will appear (select a directory that will only have one CSV file in it)
NodejsPath='/c/Program Files/nodejs' # Where Nodejs installed on your system
MousePath='/d' #Where MiniMouseMacro is installed
# ****************************************************************************************
# USER SPECIFIC Variables - Please enter your values here
# ****************************************************************************************
api_secret_hash='2ce212ef676099da17ec5aff64db0c83bf3f7b4f' # This is the SHA-1 Hash of your API-SECRET string
your_nightscout='https://yourwebsite.azurewebsites.net' #'https://something.azurewebsites.net'
gap_mins=10 # time between CSV uploads (roughly). Suggest between 5 and 10 minutes and always start higher
Selenium_Upload_Example.html
This contains an example Selenium IDE file that can be modified to use your particular CareLink details (see below)
Take a Breath
At this point your SD Card should contain the following structure (this includes optional TeamViewer setup file, which allows me to easily remotely access our CareLink PC) |
There are a couple of things that need installing before we go further
Install Selenium IDE
Please download and install Selenium IDE from here. You'll need to restart Firefox after downloading. When you open Firefox, you should now have a Selenium IDE ("Se") button towards the top right of the Firefox window:
Click on Selenium IDE button, circled in red above.
Click File, Open, Select the modified Selenium_Upload_Example.html file from the SD Card's root directory (i.e. the copy you made earlier).
This file, please change YOURUSERNAME and YOURPASSWORD to your CareLink username and password (you can do this in any text editor or wait until Selenium IDE is installed
These only get used and sent to CareLink - they are not sent or stored elsewhere outside of this file.

Click File, Save Test Suite (I've called mine Upload_n-CSV1)
Then Click Recent Test Suites and select your file again (to reload it)
Click on the clock symbol (top right) and select Play Test Suites Periodically. Choose your repeat times to match the schedule (5 or 10 minutes probably) set in your config.sh file.
Install Git-Bash
Download Git SCM via https://git-for-windows.github.io/Install, accepting all defaults until you get to select terminal emulator: Select
Use Windows' default Console Window

Install nodejs
Download and install nodejs (select the latest stable version).Before going further, as per my earlier post please start with carefully following the excellent and detailed instructions provided by Nightscout and also check CareLink is ready to go...
Setup Nightscout

To get your Nightscout website and associated database working please carefully follow all the instructions set out in the setup wiki hosted by Nightscout here.
By the end of the setup process, you should have the following up and running
- Mongo DB, with a unique DB name, user and password set
- Github to fork the main Nightscout CGM Remote Monitor
- Azure website account and website setup, including:
- Linked to Github fork of CGM Remote Monitor
- Correct connection strings, which must include the following names:
- mongo
- mongo_collection
- API_SECRET
- enable [for the plugins]
You do need to setup Care Portal to allow additional pump data, such as basal rates and bolus events, to reach Nightscout. I have my enable connection string set to "enable careportal basal rawbg iob cage bwp"
No need to enter the Dexcom settings.
No need to enable the Medtronic Connect plugin
No need to enter the Dexcom settings.
No need to enable the Medtronic Connect plugin
Setup CareLink
Getting CareLink all set essentially means making sure everything works manually and is set to mg/dL*
*From version 0.75 onward, there's no need to change units in CareLink.
Follow Medtronic's instructions precisely when first attempting a pump upload.
Install Java if prompted and complete any system confirmation requests to enableMake sure you can manually upload data from the pump to CareLink.
Make sure you can manually select a CSV Report and download it.
Make sure you can manually select a CSV Report and download it.
Setup CSV-Nightscout link
Open a bash terminal window:
Start, All Apps, Git Bash
Change to the directory where you've downloaded mmcsv640g, e.g. by typing:
cd /d/mmcsv-mmcsv640g
(NB forward slash and drive letter d/...... to get things going in the bash shell)
Once you're sure you're in the correct directory, type:
npm install
Once you're sure you're in the correct directory, type:
npm install
If you get an error along the lines of can't find npm or nodejs, type:
export PATH=$PATH:'/c/Program Files/nodejs'
You might get a couple of lines of grumbling / advisories, but you shouldn't get a stream of warnings or errors.
Click!
Start Firefox and manually login and go to the Upload page.
Manually start the Mini Mouse Macro application you downloaded earlier
Record a simple macro to record you clicking the Finish button on that page.
Save the macro as mmcsv640g(.mmmacro) in the same directory as the application (e.g. /d)
(There's an example macro in the repo, which performs two clicks, covering the location of the button on three different windows systems I've tested this on so you might find you don't have to make any changes to that one)
Automate - Check List for each Restart
Aim: Pump - CareLink - CSV - Nightscout without having to do anything
Aim: Pump - CareLink - CSV - Nightscout without having to do anything
Start Firefox and maximise or set the window size and location to match that used for the mouse click macro.
Log into CareLink manually each time you restart (e.g. every few days) and check you can upload pump data and download a CSV file.
Click on the Selenium IDE icon.
File, Recent Test Suites, click on yours...
Ensure Periodic running is 'on' (look for the highlighted clock symbol)
Open a Git Bash window and type:
cd "/d/mmcsv-mmcsv640g"
./mmcsv640g.sh "/d"
where /d is the root directory of the sd card, where you popped the updated config.sh file.

The script is now running in coordination with the Selenium Suite file you saved and scheduled earlier. If you need to stop it at any time you can click and close the Git Shell window or (nicer) press Ctrl-C. To restart after Ctrl-C, press the up arrow to bring back the text and press Enter.
If you want to automate some of the startup process, copy the StartNS.sh file to your install directory (e.g. "D:/") and double click on it to launch VirtualHere, Firefox and the mmcsv640g script. You may need to edit this simple file to use, for example 64-bit VirtualHere or a different directory.
If you want to visualise Nightscout on the same device, you need to use a different browser (MS Edge, Chrome) and position it to one side of the Firefox window:

Finally, as the system relies on a simulated 'click' on the screen, please don't open any windows that will sit over the Finish button and don't lock the screen during use. You may need to change your Power Settings to ensure the screen stays on when you close your laptop lid for example.
Please Be Careful
The same level limitation of use and caution apply as per my previous posts regarding Nightscout:
All information, thought, and code described here is intended for informational and educational purposes only. Use of code from Github is without warranty or support of any kind.
Each element of the system can fail at any time rendering the system unusable. There is no password protected privacy or security provided by these tools; all data you upload can be available for anyone on the Internet to read if they have your specific URL to view your data.
Do not use any of this information or code to make medical decisions.
Connecting and using the Bayer meter via your mobile phone / any other unsupported device may damage your phone and/or the Bayer meter!
Although you are just replicating a conventional pump upload and report download from CareLink, automating this process may breach your User Agreement with Medtronic for the use of their CareLink site.
Finally, every time you upload to CareLink your CareLink DB (and CSV file if you use that elsewhere) becomes bloated by ~180 lines of summary information: that quickly mounts up. The long term impact of that on your CareLink data is unknown.
Update: If you've landed here looking for Nightscout on your 600-series pump, thanks for stopping by :) The simplest way to get your pump on to Nightscout is to use the 600-series Android Uploader. Enjoy!
Been following your blog for a while. I have been working on this for the last few days and yesterday night I was able to produce a working set up. I still have a few minor tweaks to make on Selenium to completely automate the process, which I can do now, having played around with the Selenium plugin for hours and taking apart the example you provided. I have various pop ups like Java Console, which I need to deactivate/create a work around. Yesterday, I was so ecstatic to see my daughters 640g readings on my desktop/phones via Nightscout while she slept in the other room, and witnessing the carelink auto login, pump doanload and Nightscout upload.
ReplyDeleteI must say, I have never heard of MiniMouse, Git Bash, Selenium, Virtual here or any of the websites and accounts required for Nightscout - but was able to get your set up working, which is a great testament to your documentation and the files you provide. Its been a huge learning curve for me over many nights, but could not have been possible without your pre coded files and the clever Virtual Here USB IP app.
I just want to highlight to other parents who have kids on the 640g, that it is possible to replicate your work. I don't understand coding, but the steps are clearly documented and easy to follow. Also, looks like you have been updating and improving the steps within your blog.
You have done an amazing thing here Matt. I don't have facebook, or would have posted my appreciation there with the wider audience. Thank you for all your work and thank you Nightscout
Shaik, that's fantastic to hear: thank you so much! Feel free to get in touch via this blog if you need any direct assistance going forward - we can then set up a direct conversation. I hope you find Nightscout useful. Now's probably a good time to reiterate what I said in the first blogs on Nightscout on the 640g - this jigsaw-puzzle-of-a-solution is built on top of the work of several others who have put many, many hours into Nightscout over years. Truly an amazing effort and an amazing community.
ReplyDeleteHi Matt, I've setup a small computer in the bedroom and the scripts are running. Pre-sensor the data uploaded to carelink fine but now the sensor is active it seems to get to 5% on carelink then shuts down the connection. I the Next Link 2.4 is about 1 meter away from the pump. The battery on the pump is new. This is the only action that is not working correctly at the moment. All Export and upload to nightscout seems fine.
ReplyDeleteHi Wifisetup, Assuming you're running with Bayer physically connected to the PC in the bedroom? In that case, upload is identical to a manual Carelink upload and so is subject to the usual connection issues. Suggest make sure all other wifi / phones moved away and try to position the pump and meter with a 'clear line' ie not with your pumper lying in the way - I do this by positioning a bayer at the head of the bed so even if she ends up laying on the pump, she's not attenuating (reducing) the signal between it and the stick. Feel free to click message on https://www.facebook.com/littlet1d/ to get in touch directly. Good luck! Matt
DeleteHi Wififsetup, I've got two Link 2.4. One of them seems to have the same problem as you have. Possibly not all Link 2.4 do not work very reliable in combination with carelink.
DeleteHi Matt, I have a different Timestamp in my SCV download "2-5-16 09:23:22" instead of "2/5/16T09:23:22". Therefor I changed "DD/MM/YYTHH:mm:ss" to "DD-MM-YY HH:mm:ss" for CARELINK_TIME in /lib/utils.js, to reflect the EU CareLink format. However this doesn't work all. Timestamps get converted to a date in 2000. Is this a Dutch-settings problem or did Medtronic change its Timestamp format for you as well?
ReplyDeleteHi, No I've not noticed Carelink.minimed.eu change anything for me here in the UK. I'm actually surprised you need to change the timestamp format as I thought moment in JS ignored non-alphanumeric characters ie DD-MM was the same as DD/MM but I could be wrong (I'm no Java expert as I've said before).
DeleteI'd recommend grabbing the epoch time in the date string and putting it into a epoch time converter (e.g. http://www.epochconverter.com/) to fathom out what's getting muddled up.
I hope it's an easy fix. I may be able to get some time tomorrow to get in front of a pc to take a look but fingers crossed you'll get it sorted by then :-)
thanks, matt
Turns out that I need to select 'English' otherwise the downloaded csv could not be interpreted by the parser. However also the csv separator was different in my case ";" instead of ",". Even worse, both separators where mixed in some of the csv records. I think Medtronics chose a ";" separator because in Dutch we use the comma for decimals (eg BG=5,3). Fortunately I had to select mg/dl anyway for which decimals are not used.
DeleteSo it turned out not to be a timestamp notation issue. I think I got this working now.
Great to hear you've worked this one through: I hope you find it helpful now it's working.
DeleteHi Matt well I've started. I've got as far as the OTG cable bit and the android phone. Can you recommend an android phone. I'm an avid iphone user so no idea where to start. Will only be using it for this. Also which is the Sony OTG you use, would love to have the secure one that you use if possible. Think this whole set up with take me a while. I'm computer literate but never heard of all this stuff but so far so good. Thanks.
ReplyDeleteHi Mum to Jessica,
DeleteSo I'd start with making sure you've got everything set and working on a pc, with the Bayer stick plugged in directly to your pc / tablet. If you're happy with that, I'd then try using VirtualHere on an Android phone on the same local wifi (eg at home).
You'll need an Android phone with USB OTG ("On-The-Go") capability. We've used a Sony Z3 Compact phone with Android 4.4 (it didn't work for me on 5.x, but I know other phones that have worked on Android 5.0).
I know users who have Virtual Here server working on Motorola G (2nd and 3rd generation), Samsung S4 and S5. In theory something like http://www.amazon.co.uk/OUKITEL%C2%AE-Original-Smartphone-Quad-Core-Cellphone/dp/B00XXUMKJ8 for £46 would work too, but I haven't tested it. If you're buying new, suggest you buy from a retailer with a good return policy just in case!
Good luck!
Thanks Matt. Will give a go on the computer first. :-)
DeleteHi Matt, in this step I have a problem:
ReplyDeleteSetup CSV-Nightscout link
Open a bash terminal window:
Start, All Apps, Git Bash
The window thats open is in MSdos
Tks Apeles
Could you check the shortcut you're using - it should point to something like c:\users\marta\appdata\local\programs\git\git-bash.exe
DeleteThe window will look like a command window, with some additional colour, user@machine and the location should be displayed instead of "c:\" or similar. Type 'ls' and press enter, if you get a list of programs you're probably in the bash shell, if you get an error you are indeed in the windows command window.
If you want to message me via facebook (www.facebook.com/littlet1d) you can send a screen shot or system-specific info. Please also double check you selected the right option for the shell installation.
I took a look at the doc … and I have got lost. What about the Bayer's meter? It is as if it went to be used as connection between the transmitter and the mobile ... but should not it be the pump?
ReplyDeleteThe Bayer meter (https://www.medtronic-diabetes.co.uk/minimed-system/contour-next-link) is used to talk to the pump, which stores all the useful info we want. Plugging the Bayer meter into the phone and using USB IP (using VirtualHere) 'fools' the PC to think the Bayer meter is connected directly to it and so CareLink will run. Comms with this setup are only pump to Bayer via the official Medtronic CareLink pathway - I do not try to talk to the Guardian Transmitter directly at all. I don't think that can yet be done, but maybe one day soon... Please take a look at the newer installation instructions if you're just starting out. http://littlet1d.blogspot.co.uk/2016/03/nightscout-on-640g-2nd-generation.html these will be updated on Nightscout soon. Regards, Matt
ReplyDeleteThanks Matt by your help!!! I was thinking the meters talk with the pump at just one direction, i mean, from meter to pump but never from pump to meter. I understand now that with this Bayer meter it is possible. So, can i use the new instructions? looks easer.
ReplyDeletegreat - yes, recommend 2nd Generation instructions - http://littlet1d.blogspot.co.uk/2016/03/nightscout-on-640g-2nd-generation.html
Delete